It’s hard to think of a more classic moderate free climb than Epinephrine in Red Rock, Las Vegas, NV. In fact, Epinephrine sits at number 10 on Mountain Project’s top 20 classic climb list. It seems to be the first route that comes to mind for every first-time visiting climber to Red Rock. I am sure it’s on nearly every multi pitch climber’s to-do list; and it’s “only” 5.9! We get many requests to climb Epinephrine, but do you know what to expect on a day attempting to climb Epinephrine?
Let’s first break it down by the numbers. Epinephrine sits at the end of Black Velvet Canyon which is approached by a mile and a half of moderate hiking. According to the guidebook, the route is 2,240 feet of climbing broken down into 16 pitches. Of those 16 pitches, 6 of those pitches are 5.9, 2 pitches are 5.8, 4 pitches are 5.7, and 4 pitches are 5.4. Finally, from the summit you will need to reverse that 2,240 feet of elevation over 2 miles back down to your car in the parking lot. I would estimate that it takes a competent party roughly 8-10 hours to complete the route on sight. A guided party will generally take anywhere from 8-14 hours. It is not uncommon to hear of unprepared recreational parties taking 12-16 hours on route or even having an unplanned bivy due to being too slow on route. Rescues are so common for this route that Search and Rescue even has an information board at the trail head detailing the descent trail with a link to a downloadable GPS map. Epinephrine is not a route to be taken lightly by beginners.
Epinephrine is most famous for its 500 feet of chimney climbing, which you would be hard pressed to find a similar feature anywhere else in the world. This famous chimney is extremely difficult to prepare for and the style of climbing you will encounter. Indian Creek style cracks in the back of the chimney will help the well versed crack climber, but it will still be mandatory to bust out some strenuous 5.9 chimney climbing for a majority of the chimney. This is not a common feature in most climbing areas and would be very hard to practice for. Luckily, we have a few crags local to Red Rock that we like to take climbers to prepare for what you will encounter in the chimney.
We are looking for you to have a certain amount of experience to attempt to climb Epinephrine:
-You are confident following 5.10a trad climbs
-You have climbed several grade III multi pitch routes (bonus points if you have climbed grade IV)
-You have experience crack climbing and confident in your hand jams
-You have experience climbing chimneys or will do a chimney prep day
-You have the stamina for non-stop strenuous labor for 10-14 hours
Lastly, if you are unsure of your stamina and you want to test yourself consider this: Take a day with your climbing partner to do a “mock Epinephrine” gym day. First hike 1.5 miles with a 25 lb pack ending at your climbing gym. (Let’s assume your gym has 50 foot climbing walls.) Climb 17, 5.9-5.10a routes. Climb 17, 5.7-5.8 routes. Finish with 11, 5.4-5.6. When finished with those 45 pitches, hike another 2 miles with a 25 lb pack. Were you able to do that in less than 10 hours? Did it feel easy or impossible? This exercise should give you a good idea of where you stand as far as physically being able to complete Epinephrine.
Alternative climbing routes in the Red Rock: Black Orpheus, Dark Shadows to the top. Community pillar is an ok prep climb, as well as Dream of Wild Turkeys,
Thomas Gilmore, AMGA Guide Mountain Skills Rock Guides, LLC
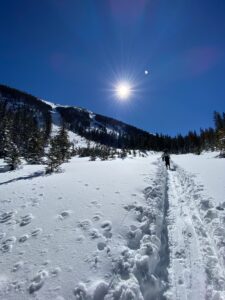
Heini hails from Finland. Visiting Vegas for a work conference, she reached out to Mountain Skills for a day of multi-pitch climbing. Coming to us with two years of solid outdoor climbing experience and having climbed Big Bad Wolf (5.9), a 3-pitch sport climb on Riding Hood Wall, during her last trip, she was looking to get up higher on the beautiful sandstone walls of Red Rock and gain more experience seconding traditional climbs.
To achieve this, we opted to hike into Pine Creek Canyon. Perched beside Mescalito, an impressive formation reminiscent of the mysterious egyptian pyramids, lies Brass Wall, home to the ultra-classic 5-pitch Birdland (5.7+). Heini brought her A-game, following my leads with style and grace, plucking out gear quickly and efficiently, leaving me to wonder if she hadn’t sold her experience level a bit short (I mean, look at those perfect lap coils! Picture included).
All said and done, Heini and I climbed the five glorious pitches of Birdland in just under 5 hours, leaving us time to take the rappells slow and enjoy some conversation in the afternoon sun with fellow climbers at the belay stations. We hope to see you again soon, Heini!
It’s happened to us all before—you go zipping down a rap line, get to the ledge, and grab the belay device to remove it from the rope, only to burn the crap out of your hand. Belay devices can get hot, but can they get hot enough to melt your rope, or maybe the sling you’re using to anchor in with?This is the question that keeps Black Diamond’s Content Manager, Jonathan “JT” Thesenga, constantly hovering around the QC lab, asking if we’ve determined whether or not a hyper-hot ATC could get him killed when rapping off a multi-pitch route. I answer with what every climber should know: you should always be clipped in with two independent slings, and use nylon if you’re paranoid, since it has a higher melting temperature than Dyneema/Spectra/Dynex.
But his questions got us thinking, so we decided to put a quick battery of tests together to get some real data to help put him at ease, and more importantly keep him out of the lab.
History
Now I’ve never heard of a case where someone’s hot belay device melted through the sling they were anchored in with, however, I have heard of the following:
Burning your hands when touching the belay device or carabiner after a long rappel—we’ve all done it
A few instances where people were rappelling quickly, stopped at the end of their rope to fiddle at the next anchor station, and the belay device melted into the sheath of their ropes
Rappelling so quickly that parts of the sheath of the rope were “glazed”
However, I have never heard of a sling being burned through by a hot belay device. So given this, we ultimately decided that were trying to learn two things:
How hot can a belay device get when rappelling?
Can a hot belay device melt a sling?
The Testing
Any of these tests will start with a few certain facts and assumptions:
For argument’s sake, Dyneema, Spectra and Dynex are all the same thing. Basically different brand names for UHMWPE (Ultra High Molecular Weight Polyethylene), which has a melting temperature of around 145 °C (293 °F)
Nylon has a melting temperature of around 245 °C (473 °F)
If something is in the neighborhood of 70 °C (158 °F), it’s basically too hot to touch
A typical “hot knife” used at climbing shops to cut accessory cord usually tops out at over 650 °C (1202 °F).
Skin burns at 100 °C (212 °F)
An old assumption in climbing is to spit on your belay device. If it sizzles, the assumption goes, then it’s hot enough to melt your rope, slings, etc.
As in any QC Lab test, there are a lot of factors to consider. What kind of belay device? Rapping on what diameter of ropes? Single or double line rappels? How heavy is the person, with/without haul bags? Single or multiple raps? What material is the sling you are using to anchor yourself? How much tension is on the sling? The permutations and combinations are endless, and in order to get a general idea we had to narrow it down, make a few assumptions, and then finally perform a few quick tests. Ultimately we settled on four different tests to help us wrap our brains around this situation.
Click to enlarge.
First, however, we wanted to find out exactly when spit actually sizzles. Seeing as this is known as good, simple indicator of temperature, we decided to prove it out.We cooked belay devices in our environmental chamber in increments of 5 °C to try to determine when spit actually sizzles.Knowing this, we could use 120 °C (248 °F) as a baseline for how “hot” is hot.
TEST #1: How hot can we get a belay device? (simulated rappelling)
A few of the crack crew of Quality Engineers at BD spent a few hours out in the parking lot setting up a simulated rappel. Let’s just say it involved 125 feet of several different rope diameters, a load cell, several belay devices, some thick gloves, an infrared thermometer… and a pickup truck. Our test setup was definitely not OSHA approved or recommended, but it did get us some good results.
The idea was to drive the truck at a reasonable rate representing a high-speed rappel (125 feet in 10 seconds), as the belayer was keeping the pre-determined load on the load cell (representing different masses of climbers and/or haul bags combined). The chart below shows each rope/gear configuration and the temperature achieved.
Test #1 results. Click to enlarge.
We attained quite the range of temperatures with our simulated high-speed rappels, from a reasonable temperature of 133 °C (271 °F) for a 250-pound climber, up to 256 °C (493 °F) for 400 pounds of a combined climber/haul-bag weight.Some of these temperatures do enter the danger zone when compared to the estimated melting temperature of UHMWPE, and even nylon, but let’s remember this was a pretty extreme, not overly realistic test.
TEST #2: How hot can we get a belay device? (actual rappelling)
Test #2 results. Click to enlarge.
Given the range of values we obtained in the parking-lot test, we then headed to a local cliff, set up a 150-foot rap (unfortunately NOT free hanging) using a 10 mm cord, and had our lightest and “not-lightest” Quality Engineers rap the line. We then took a temperature reading at the bottom with our infrared thermometer. Each guy did two rappels—one at a moderate rate and one at a high-speed-Kamikaze-not-recommended speed.This showed us two things:
Rappelling faster resulted in a hotter belay device
A heavier climber can get a belay device hotter
Test #2 results.
We could have guessed both of these, but it’s always nice to get some empirical evidence. These were single raps, however, and we were wondering if the belay device got progressively hotter as you continued to rappel, as one would while descending a multi-pitch route with multiple rappels, eventually getting hot enough to burn through your anchoring UHMWPE sling (JT’s biggest concern). For the sake of expediency, we rallied five of us to the same cliff at lunch one day and brought a fishing rod. Yes, a fishing rod. Each one of us zipped down the line at a reasonable/fast rate, took a temperature reading at the bottom, clipped the belay device onto the fishing line and reeled it back up to the top for the next guy to use.In our limited test, this shows that the belay device didn’t really get progressively hotter, and we basically peaked out at about 135 °C.
Check out the video below for a look at both Test #1 and Test #2:
TEST #3: What temperature does a belay device need to be to melt through various tensioned polymers?
Test #3.
This test shows that yes, with a tensioned sling, and pushing the belay device hard against the sling, it’s possible to get it to cut but ONLY if the belay device is at high temperatures—higher than we could obtain in the field.
This also shows that the flat webbing and Kevlar cord could withstand higher temperatures than the 10mm Dynex, with the nylon supertape performing even better still. So the fears of having a warm belay device just come in contact with a sling causing it to sever are starting to fade.
Measuring the temperature of an ATC while pressing it to Kevlar cord.
TEST #4: At what temperature does a Dynex sling actually start to melt?
Seeing as we weren’t really having much luck melting slings, we decided to slowly increase the temperature on our oven until we could visibly see a Dynex sling start to melt. A few things to remember:
The literature says that this material’s melting point is 145 °C (293 °F).
Dynex slings aren’t actually made of 100% UHMWPE. There usually is nylon included to add some color.
We didn’t really notice any visible signs of melting until the oven was stable at about 160 °C (320 °F):
160 °C – Dynex sling started to twist and contract
165 °C – actual melting
Cooking a Dynex sling in the oven.
After we let the sling cook for a while at 165 °C (329 °F), we decided to break it in the tensile tester and attained a result of 540lb (about 11% of the rating 22kN [4946 lb]). Better than we expected, actually, considering the melted mess that it was.
Conclusions
As usual this is far from comprehensive. There are many more tests we could dream up and investigate, but what did we learn from our limited testing?
Spit sizzles at about 120 °C (248 °F)
In real world use, we couldn’t get a belay device over 135 °C (275 °F)
In simulated extreme conditions we could get a belay device over 170 °C (338 °F) and even into 250 °C (482 °F) with extreme loads
The speed of the rappel definitely affected the temperature of the belay device (faster rappel = hotter belay device)
The mass of the load/climber drastically affected the resulting temperature of the belay device after a rappel (heavier load = higher temperature)
We did manage to cut through tensioned slings with hot belay devices:
Dynex at 250 °C (482 °F)
9/16″ nylon Supertape at 325 °C (617 °F)
Bottom Line
The bottom line is that we couldn’t get a belay device in a realistic scenario to a temperature where it would melt a sling. JT is more at risk of burning his hands than melting through the single 10mm sling that he’s anchored to while rapping a multi-pitch route.
However, a few things you can do to reduce your stress level:
Rappel slower—this keeps the temperature of the belay device lower
Rappel with lower loads—this also keeps the temperature of the belay device lower
Use nylon slings to anchor in with—they have a higher melting temperature
Always anchor in with two slings—this is just good practice
If unsure, the spit test can give you an idea of approximate temperature
Be safe out there,
KP
Kolin Powick (KP) is a mechanical engineer hailing from Calgary, Canada. He has over 20 years of experience in the engineering field and served as Black Diamond’s Director of Quality for over 11 years. He is currently their Climbing Category Director. If you have a technical question for KP, please email him at askkp@bdel.com and he will TRY to respond.
To help make more climbers safer climbers, Rock and Ice has teamed up with Black Diamond Equipment to present the information here.
Via: Climbing Magazine
Learn This: 5 Common Gym-to-Crag Mistakes
By Blake Herrington
We’re in the midst of a climbing gym boom. There are more than ever, and that’s great for the sport. What we’re also seeing is a mass migration of first-timers from the indoors to outside crags. After a few visits to classic crags in the Northwest, my head was spinning from all the incorrect procedures bred from the gym. Although these plastic paradises make fantastic training and practice environments, they also facilitate or even reward some bad habits that can hold you back or be downright unsafe outside. Remember that we all start off as clueless gumbies, but we don’t have to—and shouldn’t—stay that way. Observe, ask, and emulate the habits of more experienced climbers. Their practices are produced by years of experience and hundreds of days climbing outside, but you can jump-start your transition to outdoor master by avoiding these five common mistakes.
1. Don’tlead belay while standing far away from the base of the wall (fig. 1)
This “stand back and observe” habit is a function of wanting to view the entire pitch while belaying, and some gyms require that belayers anchor themselves into the floor, typically 10 to 15 feet from the base of the wall. At the crag, stand adjacent to the wall, directly beneath the first bolt or piece of protection and slightly to the side of the climber (fig. 2), moving around if you have to. In the event of a fall, you want to be pulled up, not slammed into the wall. As the climber moves up a few bolts, you can step back just a bit, but you should remain relatively close to the first bolt.You’ll spend more than half your climbing time belaying, so it’s important to develop your safe-catch skills as much as you develop your climbing technique. For an array of intermediate and advanced tips on becoming a more proficient belayer, check out 25 Ways to Be a Better Belayer.
2. Don’t anchor yourself in at the base of the wall on single-pitch routes
Unless the route begins off a narrow ledge or your climber massively outweighs you, it’s better to be mobile and able to step side to side or be lifted up off the ground in the event of a large fall, which gives your climber a softer, more comfortable catch. This mobility will help you avoid small falling rocks and ensure low-impact catches on marginal gear, two considerations that don’t come into play when gym climbing.
3. Dospot your climber before she has the first bolt clipped
Gym floors are covered by huge mats of soft foam while crags are strewn with sharp talus and tree roots. Falling from the start of a route outside, even just a couple feet up, can have devastating consequences. Until the first bolt or piece of gear has been clipped, don’t consider yourself a belayer, consider yourself a spotter. Ensure that the belay device is rigged correctly and then feed out more than enough slack to allow the climber to reach the first piece of protection. As the climber begins, take both hands off the rope and belay device and focus on spotting the climber to mitigate a groundfall. The rope is useless until it’s clipped to something. As she’s clipping the first piece, get into proper belay position.
4. Don’twalk around in climbing shoes
Rather than trodding (relatively) clean cloth floors, you’ll be walking across gravel, mud, and desiccated guano. Your climbing shoes rely on pure contact between the rubber and the rock, so even a super-thin layer of dirt in between will reduce the friction. Over time, it will damage your shoes, and it coats the first few holds of the route in whatever you just stood in before starting up the wall, which not only makes holds slippery, but is also pretty bad etiquette.
5. Do ditch of all of those “not for climbing” accessory carabiners
This might seem too cautious, but I’ve seen multiple climbers accidentally grab a plastic toy biner when they meant to grab a full-strength piece of gear. Leave those for your keychain, and if you must clip shoes, water bottle, or chalkbag, use a fully strength-rated carabiner. //
Whether it’s at the local gym or a dreamy vacation cliff in the Mediterranean, we’ve all been there: You finish a sport climb and are ready to clip your rope through the anchors (e.g., cold shuts, leaver biners, chain links, etc.) when you notice that countless lowerings and top roping have left gnarly rope grooves in the anchors. Will these grooved-out anchors hold? Will the sharp edges trash my rope?
Recently a friend of mine was doing his part at a local sport crag by replacing old bolts and rope-grooved anchors. He pulled these off and wanted me to test them to see how weak they were. (I’m not going to get into the technicalities, pluses or minuses of different kinds of anchors and am not condoning anything in anyway—I’m just looking at only one style of cold shut, one test, two data points, just out of curiosity more than anything.)
Tests
The cold shuts after testing (the new one is on the left).
Measuring the rope groove of the test samples, the reduction in thickness was about 25%. Therefore, the used cold shuts would be 25% weaker, right? Wrong.
The two rope-grooved samples tested to 2330 lbf and 2522 lbf, before they deformed and slipped open.
The new cold shut stretched all the way open at a load of only 1466 lbf.
So how and why did the rope-grooved cold shuts withstand a higher load than a brand new one? Take a look at these testing photos (the new cold shut is on the left):
The rope groove forces the rope to stay in line with the main axis and direction of load of the cold shut, whereas with a new cold shut, as the load increases, the rope is able to slide out and cantilevers it open at a reduced load. So rather than reduce the tensile strength of the shut due to removal of material, the groove seats the rope onto the spine so that the shut holds more weight before it starts to deform.
Conclusions, Comments, Remarks
Rope-grooved cold shuts keep the load in line with the strongest axis and therefore can withstand a higher load before deformation.
Just because a rope-grooved anchor may be stronger, however, doesn’t make it better. The sharp edges of rope-grooved anchors and biners can potentially damage the rope’s sheath. If you see anchors or biners out in the field that look beat up, do your part and replace them. You can also use your own quickdraws or biners at anchors in order to save on wear and tear of the fixed anchors.
Be safe out there, KP
Kolin Powick (KP) is a mechanical engineer hailing from Calgary, Canada. He has over 20 years of experience in the engineering field and served as Black Diamond’s Director of Quality for over 11 years. He is currently their Climbing Category Director. If you have a technical question for KP, please email him at askkp@bdel.com and he will TRY to respond.
To help make more climbers safer climbers, Rock and Ice has teamed up with Black Diamond Equipment to present the information here.
You’re belaying your partner while he leads the sixth pitch of a cruiser 5.8 in the Cascades with two easy pitches left. It’s a bluebird day, you’re feeling strong, and your psych is through the roof. Your biggest concern is whether that celebratory summit brew in your pack is still cold, when suddenly you hear an ear-piercing shriek. There’s a moment of utter stillness before your body is yanked into the anchor. “Are you OK?!” you yell up to your partner as loud as you can, but hear nothing except the whipping wind in response. Only now do you see the thunderheads rolling toward you in the distance.
So… now what?
Climbing is dangerous. And that’s part of the fun, isn’t it? We learn many standard steps to manage risk and prevent bad things from happening: Double-check knots! Pack a headlamp! Back everything up! But someday the shit may hit the fan, and you’ll be faced with a scary and dangerous situation. Do you have the skills to get yourself and your partner back alive? Our focus in this package is developing your ability to rely on yourself.
Step one: Learn this foundation of self-rescue skills, understand their uses, and know how to adapt them to whatever situation you’ve found yourself in. We worked with Rocky Mountain Rescue Group (rockymountainrescue.org) and other SAR experts to highlight five basic skills and three important systems in which you’ll use them. Read on to discover techniques and information that might just save your life— or your partner’s.
5 Core Skills
The following five straightforward skills have a wide variety of applications in everything from aid climbing to self-rescue. Learn how to do these quickly and efficiently, and you’ll have the building blocks to carry out much more complex climbing systems.
1. Prusik Hitch
This is a friction hitch that allows a closed loop of cord to be attached to a rope and hold a heavy load coming from above or below. Prusiks are versatile, easy to tie, and the equipment required is lightweight and minimal—all you need is 7mm cord that is equal in length to your height.
Applications: Escaping the belay, passing a knot, ascending/ descending a rope, rappel backup, hauling, crevasse rescue
Fig. 1 Take the knotted end of the cord and wrap it around the rope, going through the other end of the cord, similar to a girth-hitch. Fig. 2 Continue wrapping two more times, for a total of three wraps. Three wraps is sufficient for cord; prusiks tied from nylon webbing might require more wraps. Fig. 3 Pull the loose end of the cord so the wraps tighten onto the rope. Dress the hitch by stacking the coils neatly next to each other; nothing should be crossed, and there should be six coils in a row. Ideally, position the loop’s connecting knot (Flemish bend or double fisherman’s) near the prusik hitch, so it won’t get in the way when you use the end of the loop.
2. Flemish Bend
Also known as a figure-eight bend, this knot is excellent for quickly turning a strand of cord into a closed loop. It’s easy to tie and untie, even after being loaded.
Applications: Making a rescue loop out of cord, foot/waist prusik, joining two ropes
Fig. 4 Tie a figure eight in the end of the cord, as if you were tying in to the end of a rope. With the other end of the cord, start where the end of the original cord comes out of the knot and retrace the figure-eight all the way through. Fig. 5 When you’re done, the cord ends should be facing in opposite directions, and the knot should be pulled tight with no crossing strands.
3. Munter Hitch
Every climber should know the Munter hitch. Clipped to a locking carabiner, it can be used instead of a tube-style belay device for belaying, lowering, and rappelling.
Applications: Escaping a belay, passing a knot, tying off a climber, belaying, lowering, rappelling
Fig. 6 Clip the rope through the locking carabiner. Fig. 7 Make a bight in the rope above the biner and twist it into a loop, as shown. Fig. 8 Slide that loop over the nose of the carabiner, close the biner, and lock it.
4. Munter-Mule-Overhand (MMO)
This knot is key to getting “hands free” on a belay, meaning you’ve tied off your climber so you can take your hand off the brake end of the rope. It builds off the Munter hitch, so a correctly tied Munter is the first step.
Applications: Tying off a climber, escaping a belay, passing a knot
Fig. 9 Take the brake strand of the Munter hitch, pull it above the biner and behind the loaded rope. Twist one side into a loop, and pull the other, longer one into a bight (in the image, it’s the right loop) about eight inches long. Fig. 10 Pull the longer bight around the loaded rope and push it through the loop on the opposite side. Pull that longer loop tight, keeping in mind the new knot (the mule hitch) should sit just above the Munter. This combination is the Munter-mule hitch. Fig. 11 To finish the knot, tie a backup, in this case an overhand. Wrap the longer loop around the rope again and back up through itself, creating an overhand knot with the loop-tail running in the same direction as the load end of the rope. This overhand knot needs to sit almost on top of the Munter-mule.
5. Mule Hitch on a Belay Device
This is the same mule hitch used in a Munter-mule-overhand, but it’s tied on top of a tube-style belay device instead of a Munter hitch. The beginning steps of this version are slightly different because the brake strand isn’t run through the carabiner as it is with a Munter. It’s important to learn this method because most American climbers belay with a device instead of a Munter. While you’re tying this, it’s vitally important to keep the brake end of the rope bent sharply through the belay device. This ensures a tight belay for the climber.
Applications: Tying off a fallen climber, escaping a belay, passing a knot
Fig. 12 Pull a bight from the brake strand through the locking belay carabiner. The bight will need to be about two feet long. Fig. 13 Run that bight behind the rope and twist one side into a loop (shown on the right side in the image above). Fig. 14 Run the untwisted part of the bight through this loop and pull it tight. Fig. 15 Now wrap the bight back around the loaded rope. Fig. 16 Complete a circle around the loaded rope, and run the bight up through it to tie an overhand backup knot. Fig. 17 Notice how the overhand backup sits close to the top of the mule hitch.
Field Uses: 3 Techniques
The following three techniques (ascending a rope, passing a knot, and escaping a belay) are the foundations of self-rescue. Practice at home until dialed. Then practice some more. We don’t cover infinite scenarios that could befall you, rather skills that can be applied broadly.
Many techniques described in this article were adapted from Climbing Self-Rescue: Improvising Solutions for Serious Situations, by Andy Tyson and Molly Loomis.
Field Use 1: Ascending a Rope (core skills required: prusik hitch, flemish bend)
Moving up and down a taut (fixed) rope is a vital and basic skill, and might be needed for anything from escaping a crevasse or climbing past a too-tough overhang to retrieving a stuck rappel rope or aiding an injured partner. Practice this skill to get smoother, quicker, and more efficient, so you won’t waste a lot of energy when an accident actually happens.
Fig. 18 You need two lengths of cord and two locking biners to build two prusik loops: one for your waist, and one for a foot. The waist cord needs to be as long as you are tall, plus at least six inches. Join the two ends with a Flemish bend (A). For the foot prusik, you need a cord that is twice your height. On one end, tie a figure eight on a bight with just enough of a loop to clip a biner to—this loop will be clipped to your belay loop as a backup (B). The other end gets a figure eight on a bight that leaves a loop six to eight inches in length; this loop will be girth-hitched to your foot (C). In the middle of the cord, tie a figure eight on a bight with a 10-inch loop that sits at about hip level (D). Note: This is what the setup will look like when everything is measured properly, but you will have to unclip from your belay loop and foot so you can do the next step: attaching it to the rope. Fig. 19 Attach both the waist and foot prusiks to the rope with a prusik hitch. (If there are two strands of rope, make sure your hitches go around both strands.) Notice that the waist prusik (E) is above the foot prusik (F). Clip the belay loop-end of the foot prusik to your belay loop and lock the biner (G). Girth-hitch the other end to your foot (H). Push the waist prusik up on the rope as high as possible, so it goes taut. Sit back a little and let the waist prusik take your weight, then slide the foot prusik up as high as you can while still being able to step up onto it (I). Fig. 20 Step onto your foot prusik (J) and stand up so that your body moves upward, pulling on the rope above both prusiks (K) for balance and to gain upward momentum. Now that the foot prusik is weighted, the waist prusik (L) can be moved upward again. Weight the waist prusik, then repeat the sequence, alternating weighting each prusik and moving them up the rope. To descend a rope, reverse the sequence.
Field Use 2: Passing a knot (core skills required: munter hitch, MMO, flemish bend, prusik hitch, mule hitch)
This technique comes into play when you have a knot joining two ropes, and you need to get the knot from one side of an obstruction (belay device, Munter hitch, prusik hitch) to the other. For example, you might need to lower a climber more than one full rope length with two or more ropes tied together. The technique shown here allows you to move the knot past your belay device or other obstruction even while the ropes are weighted by a heavy climber.
Editors’ Note: The method described here is employed when lowering a climber off a tube-style belay device clipped to the master point on an anchor, but the same skills can be applied to any situation when passing a knot might be necessary. For clarity, the system is illustrated under no tension.
Fig. 21 When the knot is one foot from the belay device, get hands-free by tying a mule hitch on the belay device. Instead of an overhand backup, clip and lock a biner onto the strand leading down to the climber. Fig. 22 Prusik-hitch a loop of cord below the backup biner on the load side of the rope (A). Clip another locker on the same side of the anchor, and attach the cord with a Muntermule- overhand (B). Slide the prusik down to tighten; now you have a backup for your hands-free system. On the knot side of the rope, tie a Munter-mule-overhand in the section of rope beyond the passing knot (C) on a locker connected to the master point. Fig. 23 Undo your original belay system completely (D), so the prusik cord will take the load. Untie the overhand and mule hitch on the cord, and use the Munter (E) to slowly transfer the load to the new belay system: the Munter hitch you tied beyond the passing knot (F). Fig. 24 Remove the cord completely (G) and untie the overhand and mule hitch on the new belay system. The knot is “passed” and you can continue lowering the climber with the new Munter (H).
Field Use 3: Escaping a belay (core skills required: munter hitch, MMO, flemish bend, prusik hitch, mule hitch)
If your partner gets injured while leading or following and can’t move, you may need to get into a position where you don’t have the responsibilities of belaying to help him or her. Don’t be scared away by how complicated this system looks at first glance. You will be taking the simple core skills described in previous pages and applying them in a logical order to free yourself from the loaded belay rope and thus, assist your immobilized partner. Escaping the belay is the first step in many rescue scenarios, and getting this dialed makes you an exponentially more competent climber and partner.
Editors’ Note: The following steps are based on belaying a leader with a tube-style device off your harness but can be adapted to a variety of belaying situations. It also assumes you have an upward-protected anchor, meaning you have at least one bomber piece of protection (preferably two) that is placed to protect an upward pull.
Fig. 25 The first step of escaping the belay is to get hands-free. Tie a mule hitch with an overhand backup on your belay device (A). Now you need to connect the climber’s rope directly to the anchor. Set up a length of cord into a closed loop using a Flemish bend, then use a prusik hitch (B) to attach that cord to the rope. Use an MMO to attach the cord to the anchor’s master point (MP). To do this, add a locker to the anchor and tie a Munter hitch with the free end of the loop and pull out all the slack. Put the Munter into a lowering position by pulling enough on the load end so the hitch rotates through the biner. Then tie an MMO in the cord (C). Now, push the prusik up along the rope so there’s no slack in the system (D), but make sure you can still reach the prusik. Fig. 26 The weight of the climber needs to be transferred from the belayer to the cord. Undo the mule-overhand on your belay device, and slowly let slack out (E) until the cord goes taut to hold the rope in place (F). Fig. 27 Clip another locking biner onto the anchor and tie a Munter hitch on it (G)with the brake strand of the belay rope that’s still in your hand. Take out most of the slack, but leave enough between yourself and the new Munter hitch to remove your belay device. Fig. 28 Keeping a solid brake hand on the rope running through the Munter, take your belay device off the rope and pull in the rest of the slack. Now tie an MMO in the rope (H). Fig. 29 Untie the mule-overhand on the prusik cord, and using the Munter hitch that is still there, slowly let out slack until the climber’s rope is tensioned on the anchor. Untie the Munter in the cord (I).Fig. 30 Remove the cord entirely from the rope and its locking biner from the anchor. Now you’re left with the weight of the climber completely on a locking biner on the anchor with an MMO to hold it in place (J).
These four books are the absolute best resources for all things involving technical climbing skills and self-rescue for the vertical world and beyond.
Climbing Self-Rescue: Improvising Solutions for Serious Situations, by Andy Tyson and Molly Loomis ($19.95; mountaineersbooks.org)
Self-Rescue 2nd (How to Climb Series), by David Fasulo ($16.95; falcon.com)
Mountaineering: The Freedom of the Hills, 8th edition, by The Mountaineers ($39.95; mountaineersbooks.org)
Rock Climbing: Mastering Basic Skills, by Craig Luebben ($22.95; mountaineersbooks.org)
Taos News: Rock Climbing with Mountain Skills and SMU-in-Taos
AMGA and Outdoor Research present:
Replacing Old Webbing
AMGA and Outdoor Research present:
Lowering from a loaded belay plate
AMGA and Outdoor Research present:
Assist while belaying from above:
AMGA and Outdoor Research present:
How to Build a Three Piece Anchor
AMGA and Outdoor Research Present:
Rigging a Rappel
The Rio Grande del Norte National Monument
The Río Grande del Norte National Monument was established on March 25, 2013 by Presidential Proclamation. The new monument includes approximately 242,500 acres of public land managed by the Bureau of Land Management. The landscape is comprised of rugged, wide open plains, volcanic cones, and steep canyons with rivers tucked away in their depths. The Rio Grande carves an 800 foot deep gorge through high plains at an elevation of about 7,000 feet. Among the volcanic cones dotting the plains, Ute Mountain is the highest, reaching to 10,093 feet.
This part of the Rio Grande has attracted human activity since prehistoric times. Evidence of ancient use is found throughout the area in the form of petroglyphs, prehistoric dwelling sites, and many other types of archaeological sites. More recent activity includes evidence of homesteading.
Lying between the San Juan Mountains and Sangre de Cristo Mountains, this area is also an important area for wintering animals, and provides a corridor by which wildlife move between the two mountain ranges. The varied landscape creates habitat for a wide variety of species. Cottonwoods and willows grow along the rivers, piñon and juniper woodlands at middle elevations include 500 year-old trees, and mountain tops are forested by ponderosa, Douglas fir, aspen, and spruce. Wildlife including raptors, songbirds, waterfowl, beaver, river otter, ringtail, prairie dog, cougar, black bear, bighorn sheep, mule deer, elk, and many more species call the National Monument home.
The unique setting of the Monument also provides a wealth of recreational opportunities. Rock Climbing, rappelling, whitewater rafting, hunting, fishing, hiking, camping and mountain biking are some of the more outstanding activities that can be enjoyed in the Monument. Some locations receive high amounts of concentrated recreational use, yet seclusion may be found in the vast majority of the Monument. The Wild Rivers Recreation Area at the confluence of the Rio Grande and Red River includes campgrounds, scenic viewpoints, and hiking trails. La Junta Point, at Wild Rivers, provides a dramatic vista of the confluence of the two rivers, and is wheelchair accessible. The Orilla Verde Recreation Area includes campgrounds near the river’s edge, as well as boat launches. The Taos Valley overlook provides stunning views and trails for hiking and mountain biking.
The National Monument includes the Rio Grande Wild and Scenic Riverand Red River Wild and Scenic River, designated by Congress in 1968 to provide present and future visitors the opportunity to experience the beauty of rivers in a natural free-flowing state.
Black Dimond-QC LAB: Do ropes need to rest between falls?
January 7, 2012, 3:50 pm
Before any piece of Black Diamond gear makes it on to the shelves, it spends months, sometimes years getting put through the wringer by our Director of Quality, Kolin Powick, and his team of Quality Assurance engineers. Through extensive and meticulous testing, both in the lab and in the field, KP and his team help ensure that you can count on your BD gear to be as durable, reliable and as strong as possible every time you head into the mountains or out to the crags. Our QC Lab posts aim to answer some of climbing’s most common gear-related questions.
A few weeks ago I was at a local sport climbing cliff when one of my buddies came up and asked if I would mind him posing a “technical-sciency-engineering-like-type-question.” He wanted to know why each fall he took while working his “proj” felt progressively more painful. I mentioned the old adage from Freedom of the Hills as well as numerous climbing magazines about letting your rope ‘rest’ between harsh falls, or even switching ends before trying that crux move again. This of course is to reduce the loads experienced, which can become especially critical when climbing on sketchy gear. The rope is the number-one piece that helps absorb energy in the system by elongating—and like stretching an elastic, it needs time to relax between loading scenarios so that it can absorb the maximum amount of energy the next time. My friend looked at me, obviously not having a clue what I was talking about.
He went on to ask if there was anything else he could do to reduce the pain his kidneys feel, and minimize the load the gear sees. My smartass answer was don’t fall. No fall equals no load. But on top of that: ensure a dynamic belay, use a cord with high elongation, loosen your knot slightly after each fall (as the knot absorbs energy by tightening during a fall), let the rope rest between attempts, and use nylon slings and quickdraws which absorb a bit more energy than spectra/Dyneema (which doesn’t stretch).
To try to put some numbers to it, myself and a few of the QA engineering guys and gals dreamt up a quick test plan and headed down to the drop tower for an afternoon. We figured we’d try to see what the difference in loads seen on the top piece of protection were when:
performing successive drops as quickly as possible on the same rope
resting the rope for 30 minutes between whippers
loosening your knot between whippers
letting the rope rest for 2 hours between whippers
letting the rope rest for a full day between whippers
Typical disclaimer: This is not intended to be a full-blown, PhD-level thesis; rather it’s a mini science experiment. There is obviously much much more that one could do to expand on this. These limited data points and one page summary are intended just to give climbers some food for thought. That’s all.
Test Setup:
BD drop tower (not UIAA legit)
80kg rigid steel mass
STATIC belay (this is critical because though not typical or realistic, it is repeatable and allows us to isolate the variables we’re interested in)
10.5mm rope (new)
Chain used as quickdraw
Typical lead fall setup scenario
Fall factor: 0.26
Baseline Testing (rope resting 5 minutes between drops)
Using one section of rope in the test setup described above, the mass was dropped, and load (at the top piece of gear) recorded.
The mass was subsequently lifted back to the same height and dropped again at the 5 minute mark.
This was repeated for 10 drops.
Loosening Knot
As the loads are relatively harsh during this test setup, we found that we could not easily untie the knot, therefore we decided to place a carabiner within the figure-8 knot on the mass. This allowed the knot to be untied after each fall.
As above, the mass was subsequently lifted back to the same height and dropped again at the 5 minute mark
This was repeated for 10 drops
Rope resting 30 minutes between drops
Same as the baseline testing above however the rope was allowed to rest 30 minutes between drops
This was repeated for 10 drops
Rope resting 2 hours between drops
Same as the baseline testing above however the rope was allowed to rest 2 hours between drops
This was only repeated for one drop
Rope resting 24 hours between drops
Same as the baseline testing above however the rope was allowed to rest 24 hours between drops
This was only repeated for one drop
Observations
As expected, progressive drops resulted in increasing forces
The largest increase was from the 1st to the 2nd drop as expected
Loosening the knot after each fall reduced the load a bit, but not much
Letting the rope rest 30 min between drops had a bigger effect at lowering loads than loosening the knot, but still not much
Allowing the rope to rest for 2 hours and 24 hours had an even greater effect at reducing the loads on the 2nd drop, as expected
Allowing the rope to rest 24 hours still resulted in a 2nd drop load of 11% greater than the first drop
Conclusion
Loosening your knot, or letting the rope rest prior to a fall reduces the impact load on the top piece of gear by a small amount. However, using a different rope for each burn or switching ends of the rope would provide a greater benefit. And of course the best way to keep the forces on the top piece of gear to a minimum is to not fall in the first place. As stated above, this is not an exhaustive study and there are many more tests and experiments we could perform if we weren’t busy making the best climbing gear in the world. Such as:
“How long does it take the rope to relax to as-new condition, or will it ever?”
“What is the difference if you used a realistic, dynamic, belay instead of a static belay?”
“How about doing all of these tests with a skinnier rope?”
“What about using double ropes, or twins?”
“What if the rope is wet or frozen?”
“Does the effect of loosening your knot or letting the rope rest get greater in a more real world loading scenario?”
Maybe some day…
Climb safe,
KP
Wet vs dry runner strength by Black Dimond
October 28, 2011, 10:31 am
Last week I was climbing a classic multi-pitch route in Big Cottonwood Canyon, 30 minutes from the Black Diamond Equipment offices. Clear skies upon arrival but true to the weather lately in the Wasatch there was a downpour mid pitch 2. When we met at the belay, my partner voiced his concern. “Our gear is soaked. Are these runners going to hold if I take a whipper?” “Of course they will,” I assured him. But how much weaker are runners when wet? The truth is I wasn’t sure.
This sparked my curiosity. Is the strength of runners affected when water drenched? People say to use Dynex in snow because Dynex doesn’t absorb water, so are Nylon runners affected more than Dynex runners?
The next day in the lab I got my hands on 10 nylon and 10 Dynex runners. I put five of each in some water to soak for 24 hours. I tested five dry and five wet of each runner in the standard CE tensile testing configuration (something I do almost daily).
All samples broke at the test pin, which is typical.
Tags for this Article: sharla-hopkins, runners, qc-lab, climb, qclab
Monday, October 17, 2011 – posted by BD crew
QC Lab: Wet vs. Dry runner strength
Last week I was climbing a classic multi-pitch route in Big Cottonwood Canyon, 30 minutes from the Black Diamond Equipment offices. Clear skies upon arrival but true to the weather lately in the Wasatch there was a downpour mid pitch 2. When we met at the belay, my partner voiced his concern. “Our gear is soaked. Are these runners going to hold if I take a whipper?” “Of course they will,” I assured him. But how much weaker are runners when wet? The truth is I wasn’t sure.
This sparked my curiosity. Is the strength of runners affected when water drenched? People say to use Dynex in snow because Dynex doesn’t absorb water, so are Nylon runners affected more than Dynex runners?
The next day in the lab I got my hands on 10 nylon and 10 Dynex runners. I put five of each in some water to soak for 24 hours. I tested five dry and five wet of each runner in the standard CE tensile testing configuration (something I do almost daily). All samples broke at the test pin, which is typical.
Just note, runners and quickdraws are rated to 22kN (4946 lbf).
Here are the results:
Dynex runners don’t seem to be affected when soaked, which was to be expected. Nylon runners, on the other hand, show about a 10% decrease in strength when wet. Should this slight decrease in strength be concerning? Not really. The strength of these, wet or dry, are well above the product rating and pretty much any force that can be created in the field. Bottom line: runners are crazy strong, wet or dry. So even if my partner had gone for a ride during our rain-drenched climb, he would have been fine.
Note: If your runners or other gear gets soaked, don’t dry it out in direct sunlight. This causes degradation and a potential decrease in strength. How much? Check out an entry from the QC Lab archives: Testing Old Gear from the VRG. Dried out and sun-bleached slings broke at around 11 kN with some as low as 5 kN. That’s 1124 lbf and getting well into sketchy land.
 Mountain Skills Rock Climbing Adventures
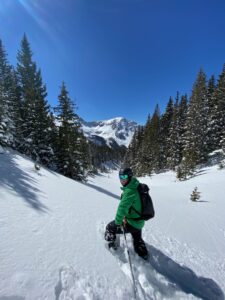
 Can a hot belay device melt rappel slings?
 Click to enlarge.
 Test #1 results. Click to enlarge.
 Test #2 results. Click to enlarge.
 Test #2 results.
 Test #3.
 Measuring the temperature of an ATC while pressing it to Kevlar cord.
 Cooking a Dynex sling in the oven.
 The used cold shuts with rope grooves. Trust it?
 The cold shuts after testing (the new one is on the left).